
boireannach: ( /ˈbo.rə.nəx/) noun woman, female (from Scottish Gaelic)
I live with boys. Lots of boys. I have a husband, three sons and a male cat. Then there’s me – the lone female in the house. (If you don’t count the resident spiders some of whom must be of the feminine persuasion. I don’t love spiders. I’m just not a fan of housework.)
It’s not a major problem. I suspect the universe gifted me such a plethora of testosterone because I can take it. Probably better than I’d take a plethora of oestrogen. I am not a girly girl. Never have been, never will be. I was quite happy to have boys. Not sure I’d know what to do with a girl. Admittedly, I was lucky they turned out to be geeky boys rather than sporty ones. Science fiction and fantasy I get. Football bores me to tears.
However, as much as a family of boys suits me, there have been times when the testosterone load gets a bit much. Especially as they have got older and messier and smellier.
One day, a bit over a year ago, during the long summer holidays, I went looking for somewhere to sit down for a while. As I wandered around the house, I found the Eldest Son sitting at the dining table eating his lunch, the Middle Son watching Japanese anime on the television in the lounge room and the Youngest Son playing video games on the computer in the family room. Oh, and the Husband sitting on my side of the bed in our bedroom listening to the cricket on the radio.
There was nowhere to go that didn’t contain testosterone. And that includes the kitchen. Even if there weren’t any boys in it at the time, all it reminds me of is endless requests for food.
It was a breaking point of sorts.
For a number of years I’d toyed with the idea of taking over the cubby house in the backyard as my own space. The boys didn’t use it anymore and it was a usable size. Unfortunately, it was full of junk and the very thought of clearing it out gave me an attack of the procrastinations. I did try. I pulled everything out one day, sorted it, threw out rubbish. Then had to put it back in when it started to rain. The next time I went to tackle it, there was more in there. Sigh.
Moaning about the situation to a friend one day, she suggested that I ditch the cubby house idea and just build something new.
This was an attractive idea.
It would entail some expense. Some studio/cabin options were in the vicinity of $20,000. They were commonly around the $8,000-10,000 price range. This was not so attractive.
Eventually, after extensive research, I settled on the idea of a basic timber shed that I could upgrade. It would mean more work but it was less than half the cost of other options.

The people of Design A Shed deserve a plug for their helpfulness, friendliness and patience.
I ran the idea past the Husband, couching it in terms of being for my 50th birthday (he went to New York for his) and adding value to the house. He agreed to the proposal.
In fact, he more than agreed and this is my favourite part of the story. He not only agreed, he got it. As I listened to him explain what we were doing to his family and our neighbours, I knew that he’d heard me.
And so began Operation She-Shed. It was long, it was arduous, it was frustrating and it took well over a year from purchase to completion but I made it. And I made it.
Following is a pictorial history of the journey from pick up at the factory to the last brush stroke. Along the way, I’ve learned to do so many things. I’ve driven a truck, constructed a kit shed, installed insulation, cut down and fitted a door, lined a ceiling, laid a floor and a deck, cut and installed skirting boards and beading, built furniture, designed and constructed planter boxes and done an awful lot of painting. I’ve used a drill, a circular saw, an impact driver, an orbital sander, a drop saw and a nail gun. I got to know my local hardware store really well. The only job for which I called in the professionals was plastering the walls. I thought about doing it myself but I was getting impatient and having it done in an afternoon was easier than figuring that one out myself.
So, as I sit here in my new space writing this blog post, I still can’t really believe it exists and it is mine. Really mine because I made it myself.
A shed load of love and thanks to all the family and friends who helped me realise this dream through practical help, moral support, lending me things and making the appropriate wow comments whenever I shared my latest achievement on Facebook. You all rock.
Picking up the shed
I must thank my friend Kath for coming to my rescue and driving the truck to Melbourne to pick up the shed. The cost of delivery was phenomenal so there was nothing for it but to collect it myself but I didn’t think this was the trip on which to learn to drive a truck. She did make me drive it back to the rental depot after we unloaded for which I am grateful because now I can say, “I drove a truck”.
Preparing the site and putting in the elevation kit
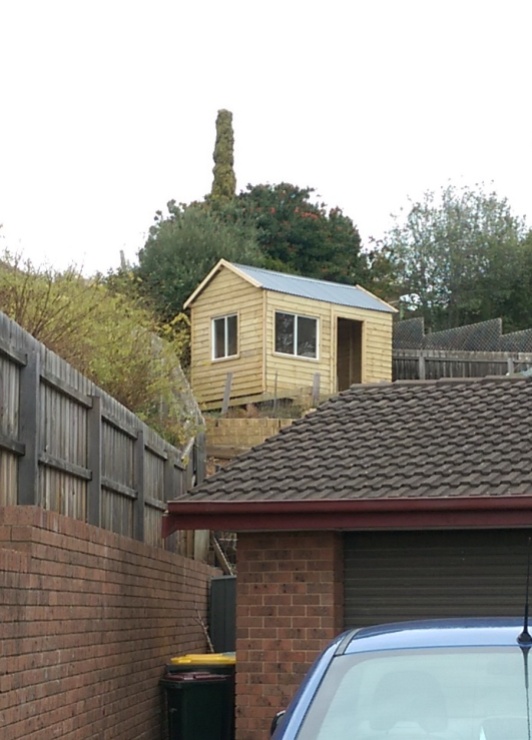
We don’t live on an easy block to put things in the backyard. Everything has to be carried up steps. We also live on clay so digging holes is a mammoth task in itself. I’m incredibly grateful to my husband for taking on the task of putting in the elevation kit.
Building the shed
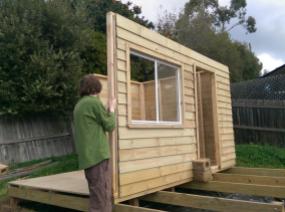
Oh boy. Or oh boys. Thank heavens for three boys. Carrying all those pieces of shed around the garage and up the steps and past the clothesline and up a path to the spot in the backyard was no picnic. They worked hard. And I’m still traumatised by the act of getting the roof on. (And yes, it’s a tad off-centre. Close enough.) I must also thank my friends Kris and Meg for lending me their impact driver and cordless drill. We would never have got it together without them.
The door
When it came to putting on the door, I held it up to the spot to check the fit and instantly lost a lot of light. Urgh. Hm, I thought. Wouldn’t a window be nice? So I went hunting through demolition yards and found a new door which I then had to cut down to fit. Still quite proud of that effort.
The verandah and deck
When it came to putting up the verandah, it was only when it weirdly sloped upwards that I realised I was supposed to cut down the railing posts to the right height. I’d already screwed them in so there was an interestingly unsafe exercise of cutting through them with a circular saw vertically while the boys held up the roof. Installing the deck was much more fun. I rather like banging in nails. Once more, thank you to the boys for carrying, lifting and holding.
Outside painting
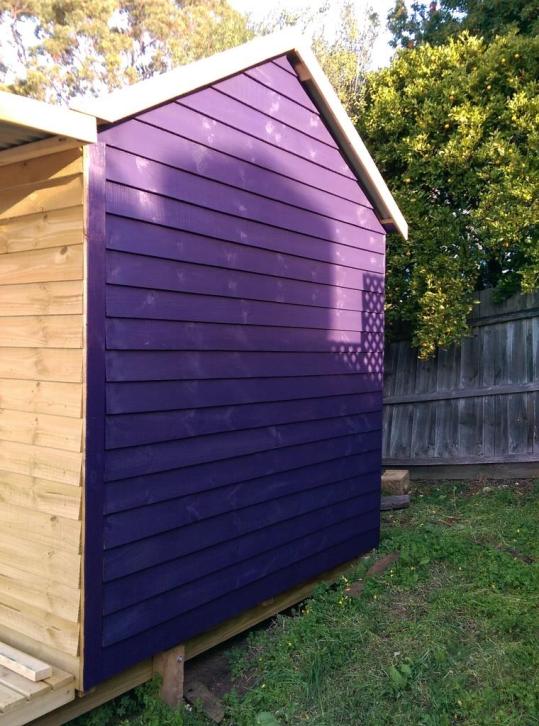
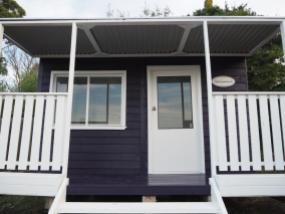
One day I had a vision of my shed in dark purple and white. Cruising around the paint charts at the hardware store, I dismissed one colour as too dark and too blue but then read the name. “Dark Heather”. Well. Nothing for it but to ask for a sample pot. When she opened the tin, I knew it was exactly the colour I’d been looking for.
Insulation, ceilings and walls
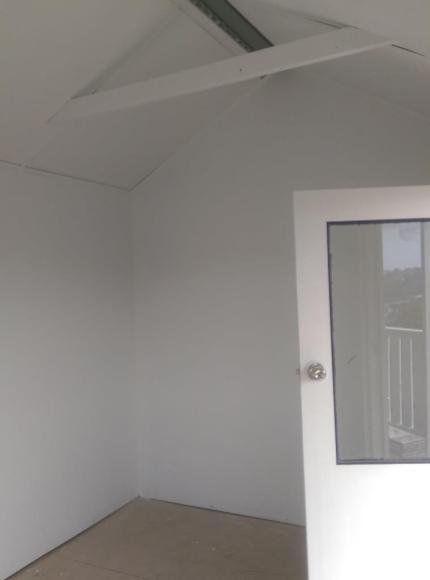
The one thing about timber sheds with a corrugated iron roof is that they are hot. I knew I was going to have to insulate and I also came to realise that I was going to have to install some sort of ceiling with insulation even if it meant losing the skylight. My solution was to cut the leftover insulation in half to make it thinner, glue it to the back of some plywood and screw said plywood to the roof frame. It came up better than I could have hoped. Thank you to my friend Carolyn for solving the issue of “how do I get massive pieces of plywood home in a sedan?” by lending me her tray truck. When I got the quote for plastering the walls, I nearly had a heart attack and I wondered if I could repeat the same process on the walls as the ceiling but by the time I added up the materials, I was only a few hundred dollars short of the quote. I figured that $300 was worth the ease of getting someone else to do it. Thanks to Craig at Feathers Plastering for doing the job that many other plasterers turned down as not worth their while.
Beading and inside painting
Craig had asked what I was going to do about the join between the walls and the ceiling and I told him not to worry, I’d find and install something. Part way through installing the beading when I’d broken my drill bit drilling guide holes, banged my fingers, dropped the hammer from the ladder about five times and uttered numerous four-letter words, I was wishing I’d added it to Craig’s quote. But I got there in the end. And my solution to how to meet the pieces in the weirdly angled corners was to just keep the edges straight and then hide it all under putty and paint. Worked a treat. Painting the inside white added so much lightness that I didn’t miss the skylight at all. I also discovered I am not a fan of painting. I don’t have the patience. Although, using the roller was quite fun.
Floor and skirting boards
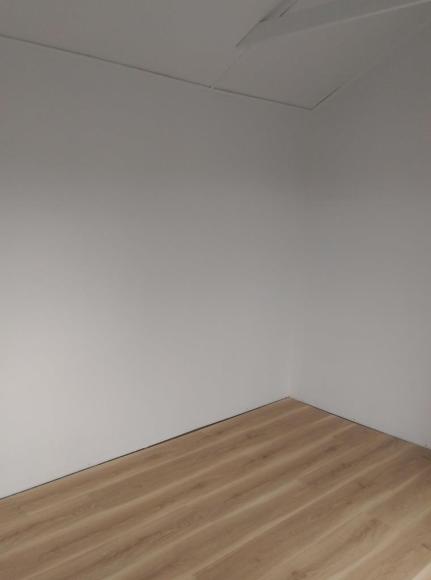
Soon after starting on the floor, I realised it really needed three people to be able to click in the whole length properly. Thanks to the Husband and Middle Son for helping out. I tried cutting the first end board with the circular saw but it was ragged so for all the rest I used a hacksaw. Yep, cut them all by hand. When it came to installing the skirting boards, I knew I was going to need a more accurate method of cutting 45 degree angles than the ‘protractor, pencil and hacksaw’ method I’d used for the beading with limited success. I put the call out for a drop saw and am grateful to my friends Julie and Cam for lending me not only the drop saw but also a nail gun. No more banged fingers. Using the drop saw was so amazing, I wished I’d thought to ask for one when I was doing the floor. I’d have had it done in half the time. I really want my own now. The nail gun was efficient but nerve-wracking. I blame that WorkSafe ad.
Steps, planters and painting the deck
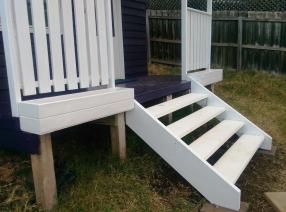
For some reason, when we put the shed together on top of the elevation kit, it didn’t fit properly and we ended up with the front stumps exposed. This presented a problem for installing steps so I had to extend the deck. I think this was probably my favourite thing about this project – coming up with creative solutions to problems. From a decorative disc to hide an off-centre door handle hole to shoving a piece of timber up the inside of the door when the bottom hinge wouldn’t attach properly to building planter boxes to hide the posts sticking out the front, it’s been gratifying to find ways to hide the flaws.
Decking it out and connecting power
Ooh, the fun bit! I had a highly successful trip to Ikea for a shelving unit and a place to store tea and coffee supplies. And putting together Ikea furniture seemed a breeze after the various challenges with building the shed. It was a fun, if very wet, weekend. (You should have seen the mud I had to clean off the deck…) The desk is an old work desk that the boys used as a computer desk until we rearranged the family room and moved the pc to a smaller desk. I sanded it back, painted it and attached some new handles to the drawers so it wouldn’t look like the place that boys had sat at for years. And there were all sorts of bits and pieces sitting around waiting for a home, especially my series of coffee-themed pastels by artist and friend Jill Shalless. But my favourite item is the chaise-longue. I must thank my friend Naomi for spotting it on an op shop’s Facebook page and letting me know and then driving us to the town more than an hour away to pick it up in her station wagon.
Power at this stage is connected via an extension lead from the garage. Probably a more permanent solution is warranted but it’s working quite well at the moment. (I’d considered a solar system but couldn’t justify a system that cost more than the shed.)
What’s with the name?
I knew I wanted a name for my place. It’s personal to me. Boireannach is Scottish Gaelic for woman. It was perfect. It looks like the name of something, it represents my Scottish heritage and it signifies the importance of my ‘no boys allowed’ space. Thank you to my friend Margaret-Rose (aka M-R) for the nameplate.
Wondering how to pronounce it? Here’s a fun video that may help you.
The End and the Beginning
So there you have it. If you’ve stuck with me this long, thank you. It has been important to me to document this journey officially. It’s been a long road but I got there. There’s still some landscaping to be done but at last I’m in situ. I’m looking forward to the many creative adventures ahead in a place of my own.















What totally magnificent space and so utterly perfect for you. I so understand your need for this — even though my world has half as many boys and one of them has flown the coop anyway. In our over-sized house I have no space to call my own and I ache for one.
LikeLiked by 2 people
Only another mother of only boys would fully understand. 🙂 It’s almost magical to have space that is only mine.
LikeLiked by 1 person
😀 so glad you have it. I’m working on mine.
LikeLiked by 1 person
Love, as always my ver dear friend
LikeLiked by 1 person
Very….. not ver…
LikeLiked by 1 person
I knew what you meant. Thank you for travelling the journey with me. You’ll always have a presence in my space. 🙂
LikeLike
It is a beautiful thing.
LikeLiked by 2 people
I’m inclined to agree with that statement. 🙂
LikeLike
What an interesting story! 🙂 And lovely place where you live!
LikeLiked by 3 people
And quite a lengthy one but there was a lot to cover. Thanks, Pike. We’re very fortunate. 🙂
LikeLiked by 1 person
This is wonderful, Heather, and you are awesome. I am heading off to work, so I’ll be back to read the entire post. The She-Shed rocks!
LikeLiked by 2 people
Thanks, M-J. Hope you have a squirrel-free day.
LikeLiked by 1 person
I’m so so incredibly impressed. Not just with how your she-shed turned out, and it looks so awesome, but at all the roles you took on along the way. Amazing!!! Enjoy your new space. 🙂
LikeLiked by 1 person
Thanks, Miriam. It was certainly a learning curve. 🙂 I really did fall in love with that drop saw, though. I want one for Christmas. 😀
LikeLiked by 1 person
Okay, so now it’s time to drop some big hints. 😬
LikeLiked by 1 person
Mmm? What are you intending to do with it?
LikeLiked by 1 person
Cut things? Very neatly? And at an accurate angle if I want to?
LikeLike
AMAZING, what a wonderful job Heather!! It looks like a great space….love the location in your backyard, very relaxing looking out at your view. Well done on a top job 👏👏👏
LikeLiked by 1 person
The view is the icing on the cake. Love sitting at my desk looking out the window. Thanks, Jacqui.
LikeLiked by 1 person
I told her to put th desk against the back wall, ’cause otherwise she’d get nothing done. Ve shell zee … [grin]
LikeLiked by 1 person
WOW. Just wow. From running a marathon to building your own loft in the sky…props to you. It did sound you had to solve many problems your way, problems that you caused yourself and in the end you outsmarted yourself with a great result 😀 From certain angles, that Dark Heather paint actually looks more dark blue than purple. Amazing how so many around you pitched in to make your shed. They must have thought it a very amusing project.
Now, how about making a two-storey house with your own hands from scratch? 😀
LikeLiked by 1 person
Yeah…nah. I think I would have a nervous breakdown!
Yes, the colour is a bit weird like that. It’s definitely purple up close. But I kind of like that anomaly. All part of the eccentric charm. 😉
LikeLiked by 2 people
This was a fun read and you did an excellent job, Heather. I’m totally proud of you! Figuring out creative ways to turn mistakes into bonus features is all part of construction. It looks like a great space for some testosterone-free creative endeavors. Enjoy the she-shed!
LikeLiked by 1 person
Thanks, Dan. Given I had no idea what I was doing, I think it turned out pretty well. 😉 And I don’t mind the imperfections because I know I made it myself.
LikeLiked by 1 person
As said before Mistakes are creative opportunities. Great result of family persistence/stubbornness!
LikeLiked by 1 person
Great story and great job! Everyone needs their own private space. It’s very cool that you created your own.
LikeLiked by 2 people
Thanks, Trent. It was an awfully long post but I really wanted to put it all out there. Even though there were days when I wished I’d spent more money for something ready to move into, I’m glad now that I created it myself.
LikeLiked by 2 people
Oh my goodness! That is just delightful! What a wonderful place to call your own! I just love it! Well done!
LikeLiked by 1 person
Thanks, Joey. 🙂
LikeLiked by 1 person
Well, didn’t you have fun! It’s quite beautiful, and looks liike a fine lookout post too. Best of all, it’s all yours, Heather. 🙂 🙂 The Superwoman efforts paid off. Enjoy it!
LikeLiked by 2 people
I did have fun. (I’ve conveniently forgotten the painful bits.) And now you know what I’ve been spending my time on. Thanks, Jo.
LikeLiked by 1 person
Whew ! – what an amazing journey, darlin H ! – but then, you are an amazing woman.
Somehow, seeing it all written up like this makes it so much more … incredible. I mean, you were always kind of dismissing your efforts as the time of construction went on: you would tell me how much faster you should be going – you with a job that became full-time, one of your sons to organize for living-in at Uni, a deep and abiding interest in and ability to be really good at running that requires Input and Training …
You are … ridiculous ! – or is it me, maybe ? [grin]
Love yer, H – you are so good at everything
LikeLiked by 1 person
Dear M-R, thank you so much for all your support and encouragement (and occasional pestering) and for the wonderful sign. It looks so good!
LikeLiked by 1 person
Wow, what a masterpiece you’ve created Heather. I’m so impressed by your determination and skills. Your little nest is beautiful and what a view. Those men in your family better watch out – you’ll go in there and never come out again.
LikeLiked by 1 person
It’s tempting. 😉 Guess they’re lucky it doesn’t have running water or..er..bathroom facilities. 😁
LikeLiked by 1 person
True. I’m guessing you could spend a few hours in there before you need to descend to reality.
LikeLiked by 1 person
Wow, wow, wow. You really are Wonder-woman or Superwoman. What a wonderful she-shed you have built yourself. Tell you what, you come and build me one of these and I’ll come and help with the planting 😀 I am now going to look out for you on Grand Designs Australia.
Much love to you H, you ROCK ❤ ❤
LikeLiked by 2 people
Sounds like a deal! As long as you don’t mind it taking a year….
Wow, Jude! Thank you! 🙂
LikeLiked by 1 person
You did say you had a tent?
LikeLiked by 1 person
A woman’s shed is essential. It should be made law. My mum had five sons but never a shed. You did a fantastic job. It must feel so nice to sit there and ponder. A place of one’s own.
LikeLiked by 2 people
FIVE sons?? And no space of her own? Your mother sounds like the most resilient person ever. Goodness.
It feels a bit like a dream sitting in there. I still can’t quite believe it’s real.
LikeLike
WOW! Well actually triple WOW! Is there nothing you can’t do Heather? Building your own home away from home. It’s so beautiful and I love that you documented and photographed it along the way. As you see every corner it must be a pat on your back for so much accomplished. Love the colour and what a view! Does this mean you will be back to the blog regularly now that you have such a beautiful spot to write in? I can only hope. Sending many congratulations to you superwoman. That’s far easier to day. 🙂
LikeLiked by 1 person
I hope so too, Sue. That’s certainly the plan.
You know me. I’ll have a crack at just about anything. But it still always surprises me when things work. 😀 And let me tell you, Google is my friend, especially YouTube. 🙂 It’s why I decided against doing the plastering. I watched the videos and knew it was a step too far.
LikeLike
I sure understand why you would want a place of your own! I had three daughters, and I still wanted a room that I could escape to!
LikeLiked by 1 person
Oh boy. I can’t even… Three girls?? Oh, the hormones! Don’t blame you for wanting an escape room.
LikeLike
That’s amazing piece of work you have completed! I’m in awe of your tenacity – I’d probably have given in and paid someone to finish it for me! 🙂
LikeLiked by 1 person
I think I just had an idea of what I wanted it to be and chipped away bit by bit. Except for the plastering. I just knew that would take me days with questionable results not to mention the dilemma of how to even get the sheets of plaster home. I’m glad I gave in on that one. And professionals would certainly have done a better job but I kind of like all the imperfections because at least they’re mine. 🙂
LikeLike
I am so late to reading this, but I LOVED your journey to creating a space of your own! You are highly resourceful and multi-talented!! I loved your idea of gluing the insulation to the plywood. Brilliant!
Now you have this magnificent space to imagine, create, and simply be.
LikeLiked by 1 person
Initially I looked at that reflective foil for insulation but it seemed so ridiculous to spend a lot of money on something when I was only going to use about a third of it and I had all this leftover wall insulation. It’s that thrifty Scottish blood that flows through my veins. 😉
One of the things I love most about that space is that it is free of all that boy detritus that seems to build up in the house. It’s soft, it’s feminine and it’s clean and tidy. I like escaping there even just for that. I know you’ll understand that one. 🙂
LikeLike
I do understand and I admit to a tinge of jealousy. I want a space of my own too!!! {said in a whiny voice}
LikeLiked by 1 person
Pingback: Gratitude Day | Master of Something I'm Yet To Discover